After supporting linear regression and TensorBoard, the next step for the tensorflow-ruby gem is to run MNIST, the “Hello World” of deep learning. But before we can do that, we need to implement support for TensorFlow’s data input pipelines. And to do that requires creating TensorFlow functions.
Input Pipelines
Let’s start with input pipelines. Input pipelines are built with TensorFlow datasets, which were introduced in version 1.4. In addition to TensorFlow’s documentation, there are lot of good introductory articles to the dataset API. A good one to start with is an article by Prasad Pai.
You’ll see datasets have a functional style to them – they let you string together operations such as batch, repeat, shuffle, map, etc.
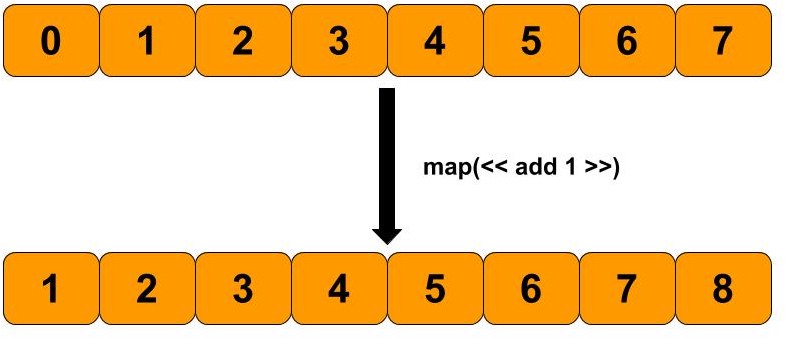
Let’s focus on map. Borrowing an image from Prasad Pai, he shows a map dataset that adds the value one to each of its records.

So how do you do that in TensorFlow? Here is the hard way, using just graph operations:
map_function = Graph::Graph.new.as_default do |func_graph|
  x = Tensorflow.placeholder(:int32, name: "x")
  one = Tensorflow.constant(1)
  plus_one = Tensorflow::Math.add(x, one)
  func_graph.to_function('map_function', nil, [x], [plus_one])
end

Graph.current.add_function(map_function)
First we create a new, scratch graph. We then define a placeholder for the input value, which in this case is going to be an integer called “x.” Then we define a constant of 1 and add it to the placeholder. Now that the graph is complete, we convert it into a function and add it to the current graph we are using.
Now let’s use the function:
components = [[1, 2, 3, 4, 5, 6]]
dataset = TensorDataset.new(components)
map_dataset = MapDataset.new(dataset, map_function)
result = self.evaluate(map_dataset)
In this code, we first create a dataset that contains 6 records (1, 2, 3, 4, 5, 6). We then create a map dataset, passing it the map_function we created above. If you execute the map dataset (in eager or graph mode), you’ll see the output is 2, 3, 4, 5, 6, 7.
@tf.function
Creating a mapping function wasn’t that hard, but it sure was a lot of boilerplate code. If you look at Python code examples, you will see something that looks more like this:
@tf.function
def map_function(x):
  return x + 1
That sure is a lot nicer. But what is @tf.function? In Python, something proceeded by a “@” is a decorator, which is a function that modifies the function that follows it. In this case, @tf.function analyzes map_function and builds a graph out of it. The details are explained here, but TensorFlow either traces the function, parses the function (using Autograph), or does both to create a new graph function.
Can we do the same thing in Ruby? Yes, of course we can. But its a lot of work. But we can at least get partway there without too much effort.
First, we want to mimic the @tf.function syntax. In Ruby, however, @ means an instance variable. So to mimic this syntax we need to create an instance variable called @tf. W can do that via a module. tensorflow-ruby includes a module called Tensforflow::Decorators, and defines it like this:
module Tensorflow
  module Decorator
    def self.extended(klass)
      this = self
      klass.instance_eval do
        @tf = this
      end
    end

    def self.function(input_signature = [])
      .. do stuff ..
    end
  end
end
When you extend your class with the module, it will now have a @tf instance variable that points to the module. And notice the module includes a module function called “function” – thus @tf.function works correctly.
Now that we have the syntax in place, how do we implement it? The first step is we wrap the original function using alias_method. The wrapper code is responsible for generating the boilerplate code – creating a scratch graph, creating the input placeholders, converting the graph to a function and finally adding it to the current graph.
This all happens when this code is called:
map_dataset = MapDataset.new(dataset, map_function)Remember Ruby, in contrast to Python and many other languages, does not require parentheses to call a method. Writing map_function will execute it. But in this case, what is really executed is the wrapper function and not the original function. As described above, the wrapper function will setup the correct environment, and then it does call the original function. And the original function creates the graph. Thus the Ruby bindings use method tracing, versus method parsing.
So now we can implement our code like this:
@tf.function([[:int32]])
def map_function(x)
  x + 1
end

components = [[1, 2, 3, 4, 5, 6]]
dataset = TensorDataset.new(components)
map_dataset = MapDataset.new(dataset, map_function)
result = self.evaluate(map_dataset)
Much better! Note a few caveats.
First, you need to specify the method parameter types (and sometimes shape) in the @tf.function call for now.
Second, tracing is fragile. If you include control statements, such as if or switch, then the generated graph depends on the input. The Python implementation handles this, for now the Ruby implementation does not (so code carefully!).
With the caveats aside, we now have laid the groundwork for implementing MNIST in Ruby.